
Explore how ROS 2 camera tracking connects visual input to robotic actions in Tactigon SHAPE.
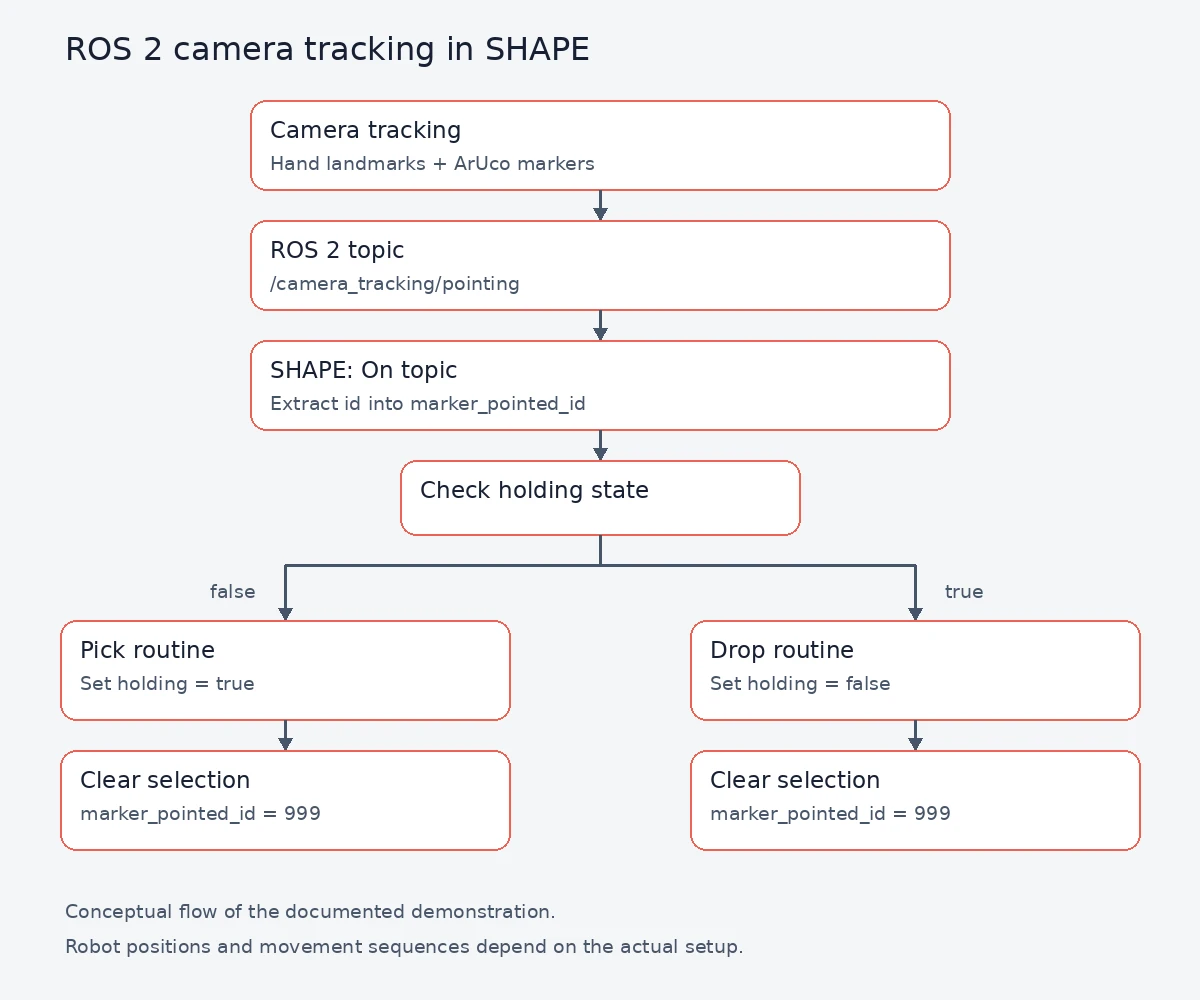
In this example, a camera detects a hand pointing at an ArUco marker. A ROS 2 node sends the marker information to SHAPE, where visual programming blocks use it to select a robotic arm’s pick or drop routine.
This guide explains the architecture and application logic. The coordinates and movement sequences belong to the documented demonstration and must be adapted to the actual robot and workspace.
Before you begin #
For the communication concepts and visual blocks used here, read:
- Getting started with ROS 2 in Tactigon SHAPE
- ROS 2 blocks in Tactigon SHAPE
The camera-tracking example requires a camera, its ROS 2 environment and the corresponding custom message definitions. Controlling the arm also requires the robot integration used by the demonstration.
How the camera-tracking system works #
The vision node combines two technologies:
- MediaPipe tracks hand landmarks.
- ArUco marker detection identifies numbered markers in the camera image.
The application uses this information to determine which marker the user is pointing at. It publishes a pointing message for SHAPE to receive.
A marker’s identifier becomes an input to the program. The visual logic then decides which routine to execute.
Understand the ROS 2 messages #
The integration defines three custom message structures:
| Message | Content |
|---|---|
Point2D | Image coordinates: x and y |
Marker | Marker identifier and four corner coordinates |
MarkerList | A collection of detected markers |
The marker identifier is the field used by the robotic arm example to distinguish the two target positions.
Inspect the camera topics #
The documented integration uses these topics:
| Topic | Purpose |
|---|---|
/image_raw | Camera image input |
/camera_tracking/markers | Detected markers |
/camera_tracking/pointing | Marker selected through pointing |
/camera_tracking/image | Image stream with diagnostic overlays |
The image stream helps you inspect detection; the pointing topic supplies the marker data used by the application logic.
Receive the selected marker in SHAPE #
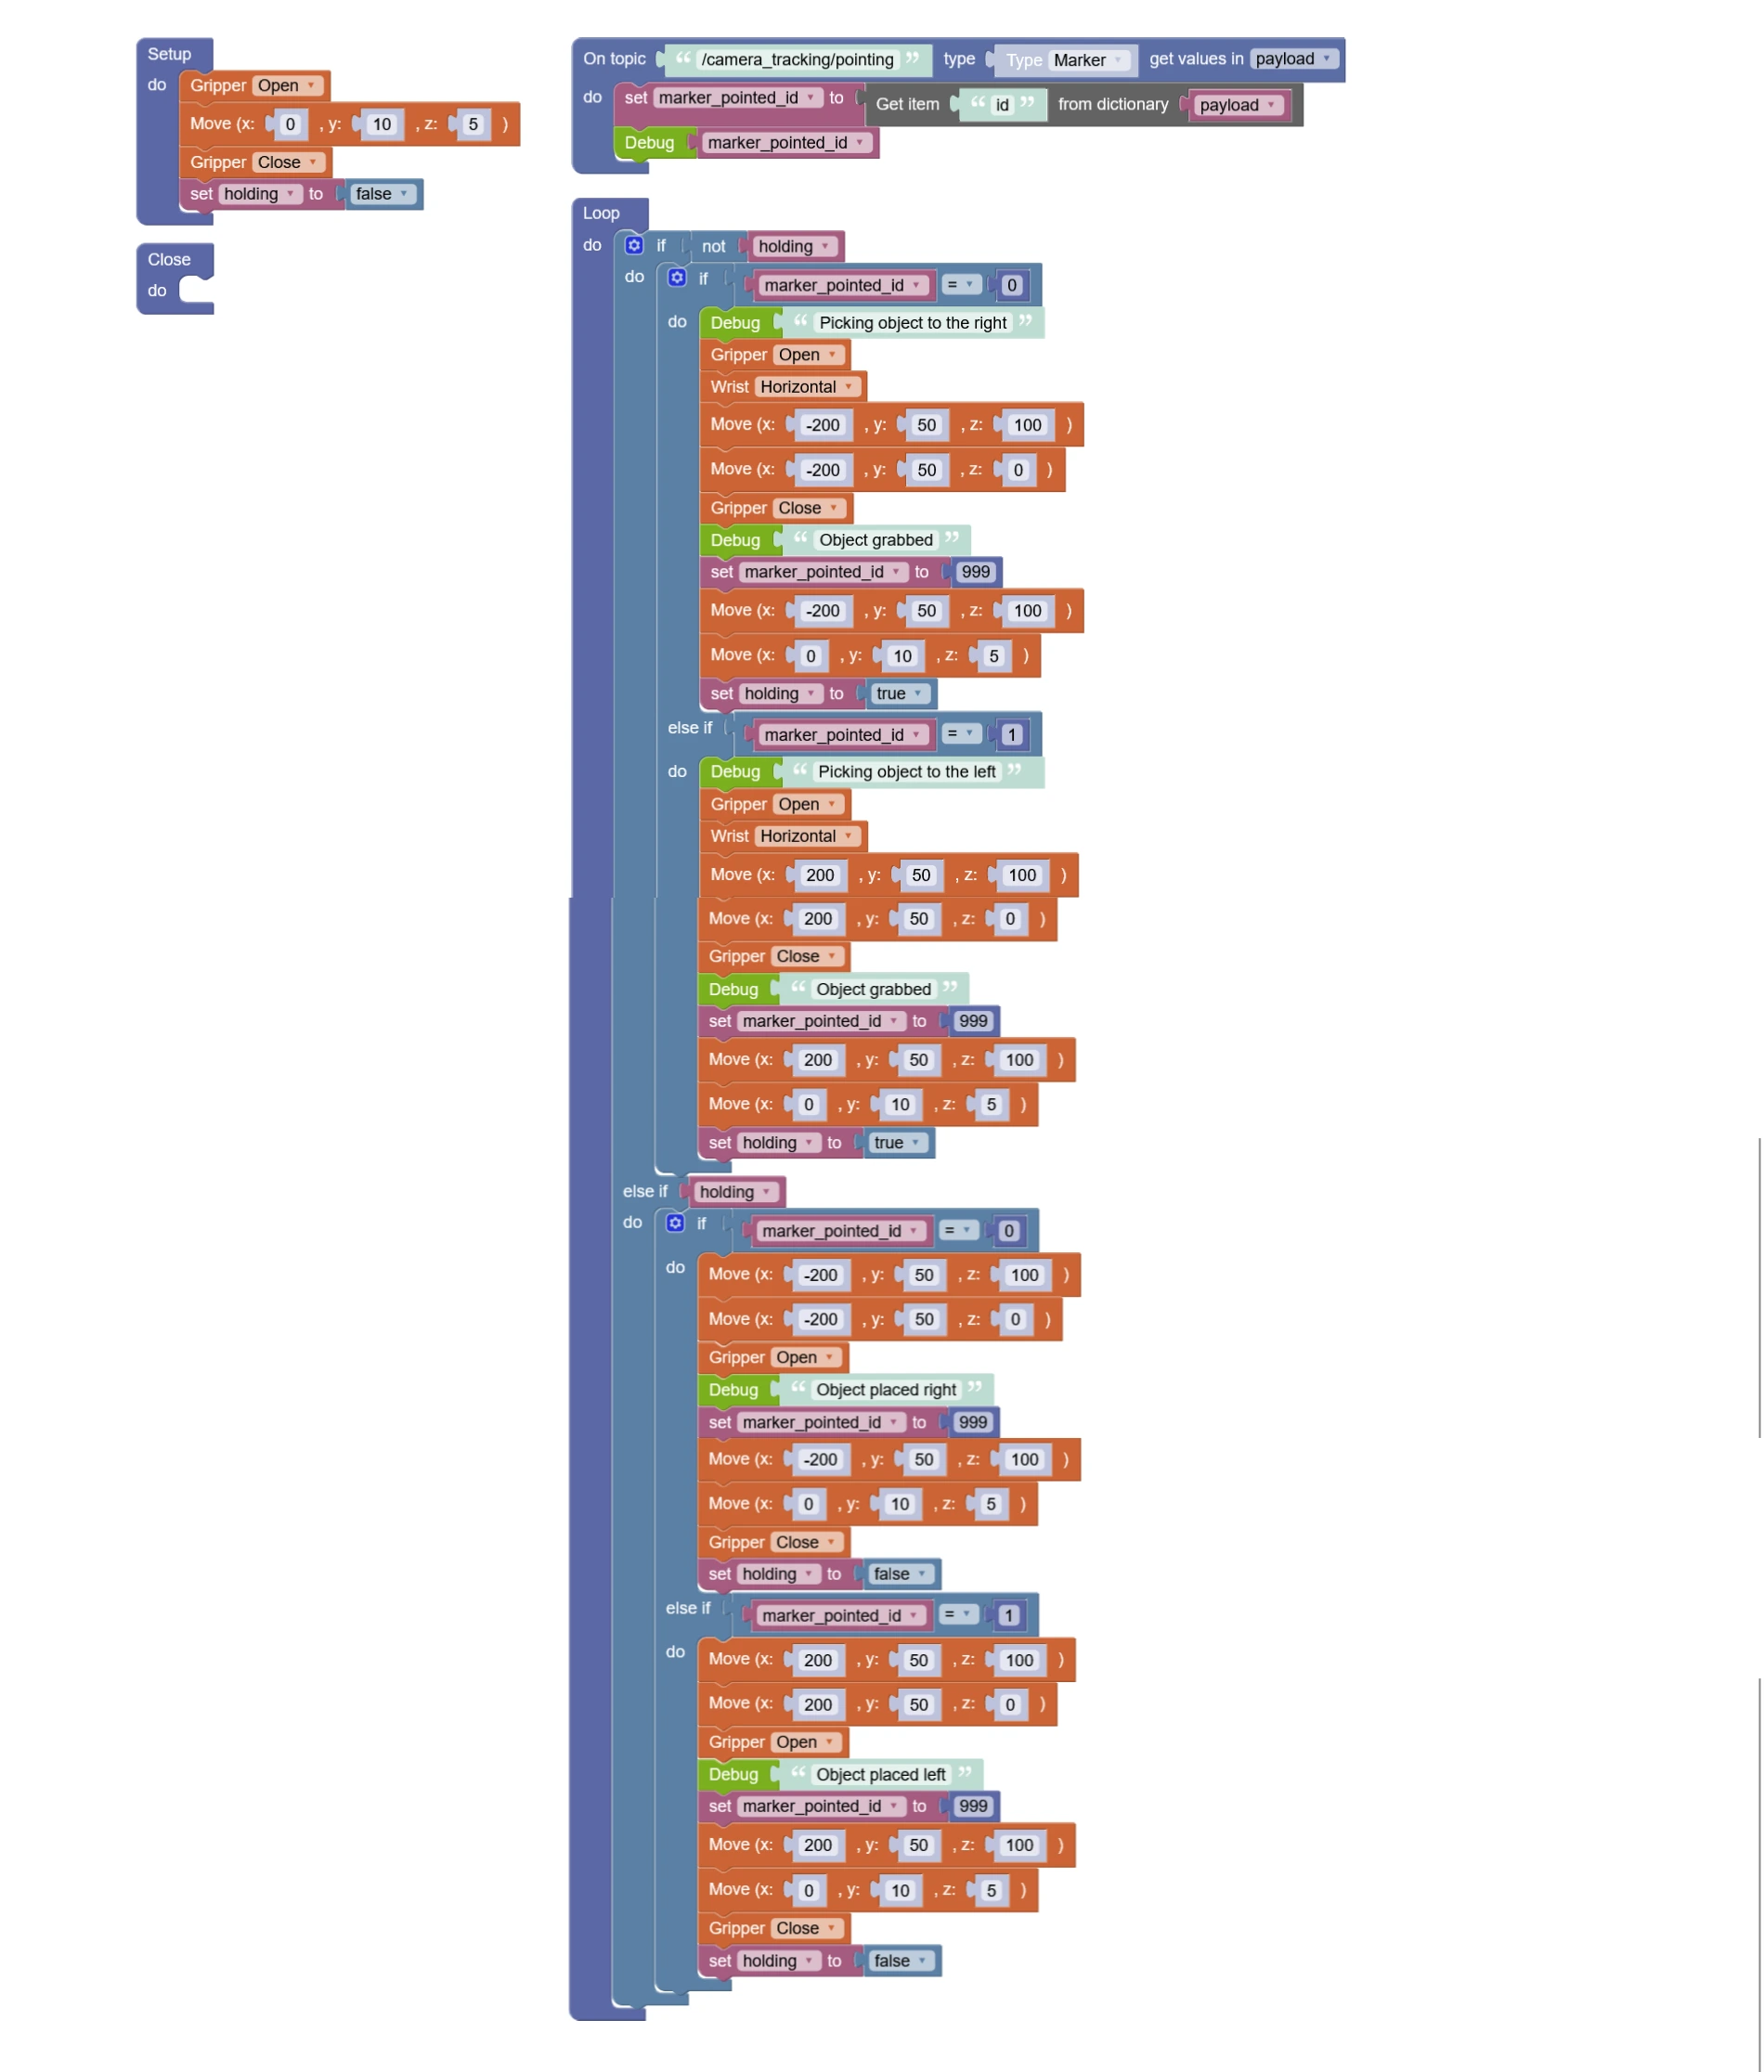
The On topic block subscribes to /camera_tracking/pointing using the corresponding custom message type.
When a message arrives, the program extracts its id field from the payload and stores it in:
marker_pointed_idIn the example:
- Marker
0identifies the right target. - Marker
1identifies the left target.
These assignments belong to the demonstration’s layout.
Control the pick-and-drop sequence #
The program uses a Boolean variable named holding to track whether the arm is carrying an object.
Initialise the program #
The setup routine prepares the gripper and arm, moves through the demonstration’s home sequence and sets:
holding = falsePick an object #
When holding is false, a recognised target selects the pickup routine.
The arm moves to the target, closes the gripper and returns to its home position. The program then sets:
holding = trueDrop the object #
When holding is true, the selected target determines the drop routine.
The arm moves to the destination, releases the object and returns home. The program resets:
holding = falseReset the marker selection #
After each completed routine, the example assigns:
marker_pointed_id = 999This clears the previously stored selection so the main loop does not immediately repeat the action using that same value.
It does not, by itself, prevent a newly received pointing message from selecting another action.
Adapt the example to your project #
Keep the communication pattern separate from the robot-specific movement configuration.
Marker identifiers select routines; those routines contain the positions and commands for the actual arm. The demonstration’s coordinates are not universal robot settings.
Before reproducing the movement, confirm the robot model, coordinate conventions, reachable positions and operating procedure for your setup.
Next steps #
Use ROS 2 blocks in Tactigon SHAPE to review subscription and payload handling.
For the implementation reference, consult the official camera-tracking and ROS 2 documentation.


